Firebase Authentication with GetX - Google Sign-in
Implementing Google Sign-in using Firebase and GetX in Flutter.

I'm very passionate about tech and am always ready for a challenge! I'm currently a fullstack developer, with a keen interest in web3 :)
Introduction
GetX is very popular as a State Management solution for Flutter. However, I like to think of GetX as an entire ecosystem of various little tools which speed up the development process considerably.
I don't have much experience working with GetX but in the short time that I've used it, I genuinely fell in love with it. It took me a while to figure out how to completely take advantage of the various tools offered by GetX but once I figured it out, I just knew that I had to write about it.
We'll be implementing Firebase Authentication (Google Sign-in) in this article. I'll try to explain every bit of code that I write so you will completely understand everything.
I will try to make this article as detailed as possible to help all the beginners out there!
Note:
There are multiple ways to implement authentication with GetX - for instance, you can implement it by making an observable variable and then use GetX's state management system. In this tutorial, I won't be doing that. I will be making use of GetX's routing system and dependency injection (including bindings).
The entire code is available on my GitHub:
Setting up our Flutter Project
1. Adding dependencies to pubspec.yaml
So, to begin with, you will need to have these dependencies installed. Feel free to copy-paste these, or better yet, install the latest version :)
pubspec.yaml
dependencies:
  cupertino_icons: ^1.0.2
  firebase_auth: 3.3.19
  google_sign_in: 5.3.3
  get: 4.6.5
  flutter:
    sdk: flutter
2. Project structure overview
You can refer to my project structure below to help you make this project quickly.
|---lib
      |---bindings
      |   |---authentication_binding.dart
      |   |---home_binding.dart
      |---controller
      |   |---authentication_controller.dart
      |   |---home_controller.dart
      |---views
      |   |---home_view.dart
      |   |---login_view.dart
      |---main.dart
We're following a simple MVC pattern here.
The models folder will contain all the models for the app. Models are essentially a class that can be instantiated to represent something. For example, we can have a UserModel class and make an object for each user. Similarly for Products as well. In this app, we have only one model to represent the users called
user_models.dartThe views folder will contain all the UI (pages/screens) used by our app. This part should ideally contain no business logic. We have two views,
login_view.dartfor Login Page andhome_view.dartfor the Home Page.The controllers folder will contain all the controllers used by our various views. Ideally, every page should have its own controller. We have two controllers,
login_controller.dartandhome_controller.dartThe bindings folder will contain two files
login_binding.dartandhome_binding.dartwhich essentially will help us organize our code more neatly. You'll understand more about this later in the article.We also have a
main.dartfile which essentially will contain the code to initialize Firebase and the various pages.
Setting up Firebase
1. Creating Firebase Project
Before we can begin writing some code, we have to link our app to firebase. I'll walk you through the necessary steps.
Head over to https://console.firebase.google.com and click on add project.
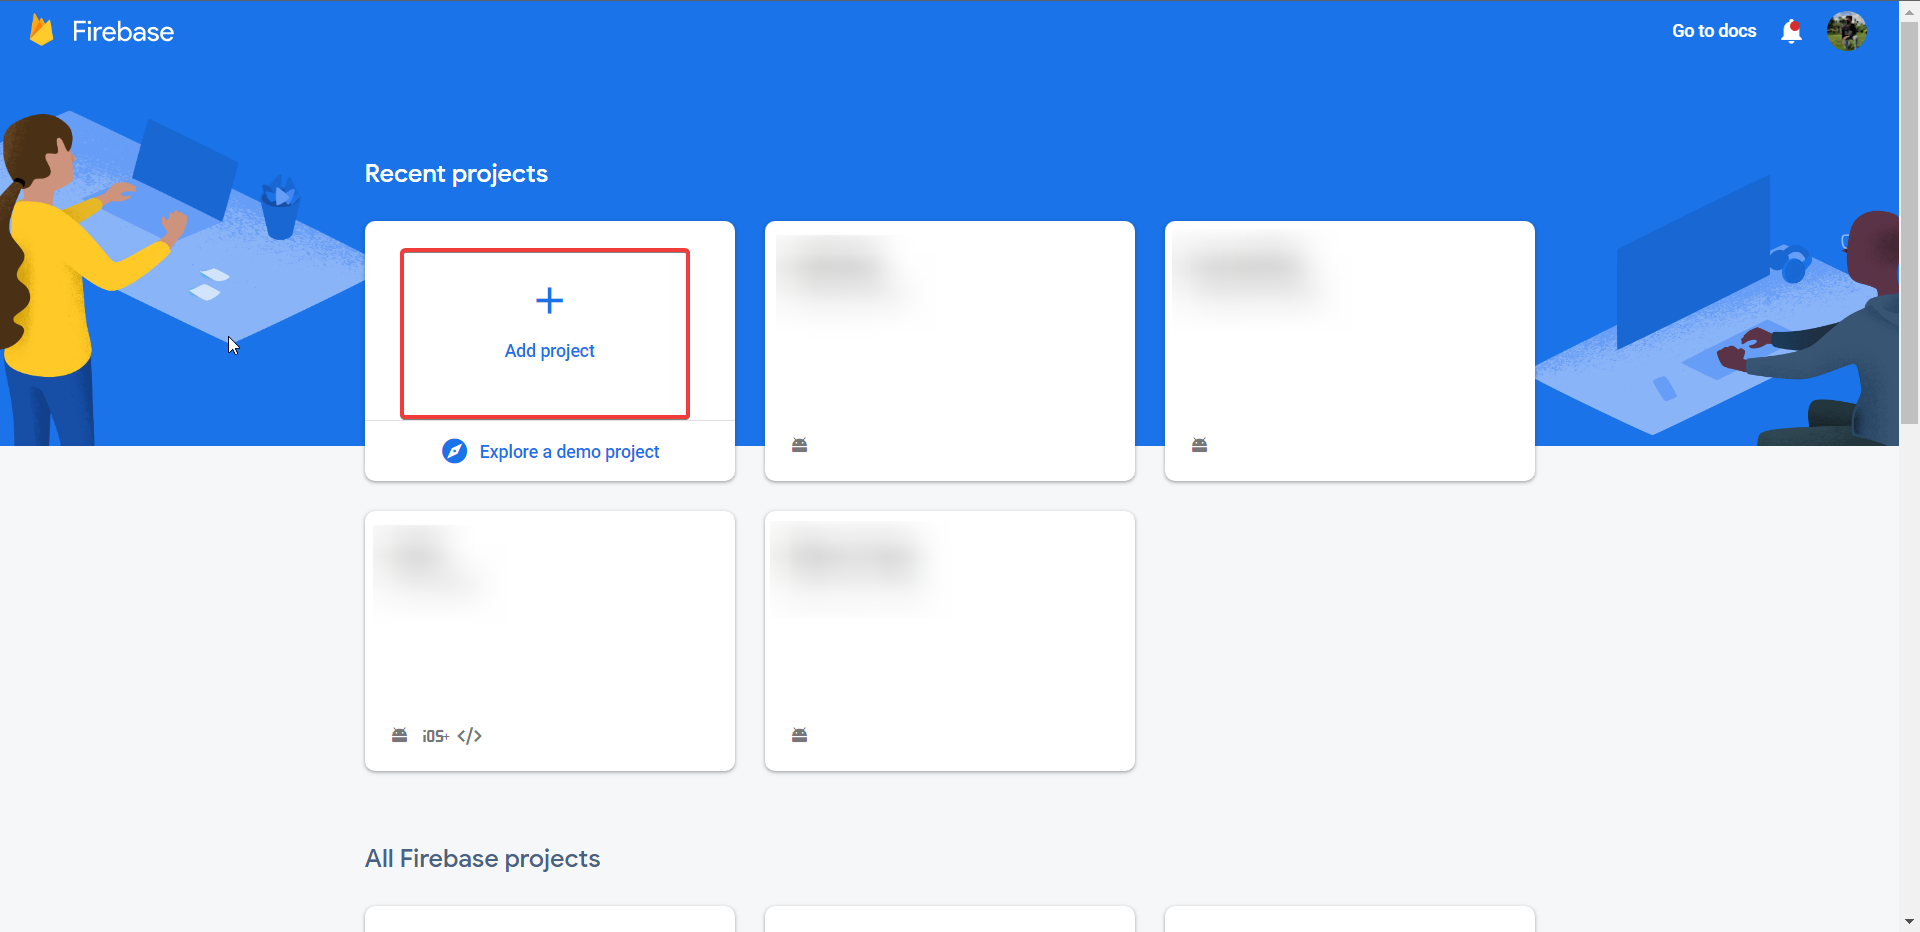
Once there, follow the onscreen instructions to create your project.
2. Generating SHA1-1 certificate
Once you're done with creating your project, we need to get a SHA-1 certificate that's required for our next step.
To get your certificate, open a terminal in your android folder of your flutter project and type ./gradlew signingReport
You should see something similar to the picture below.
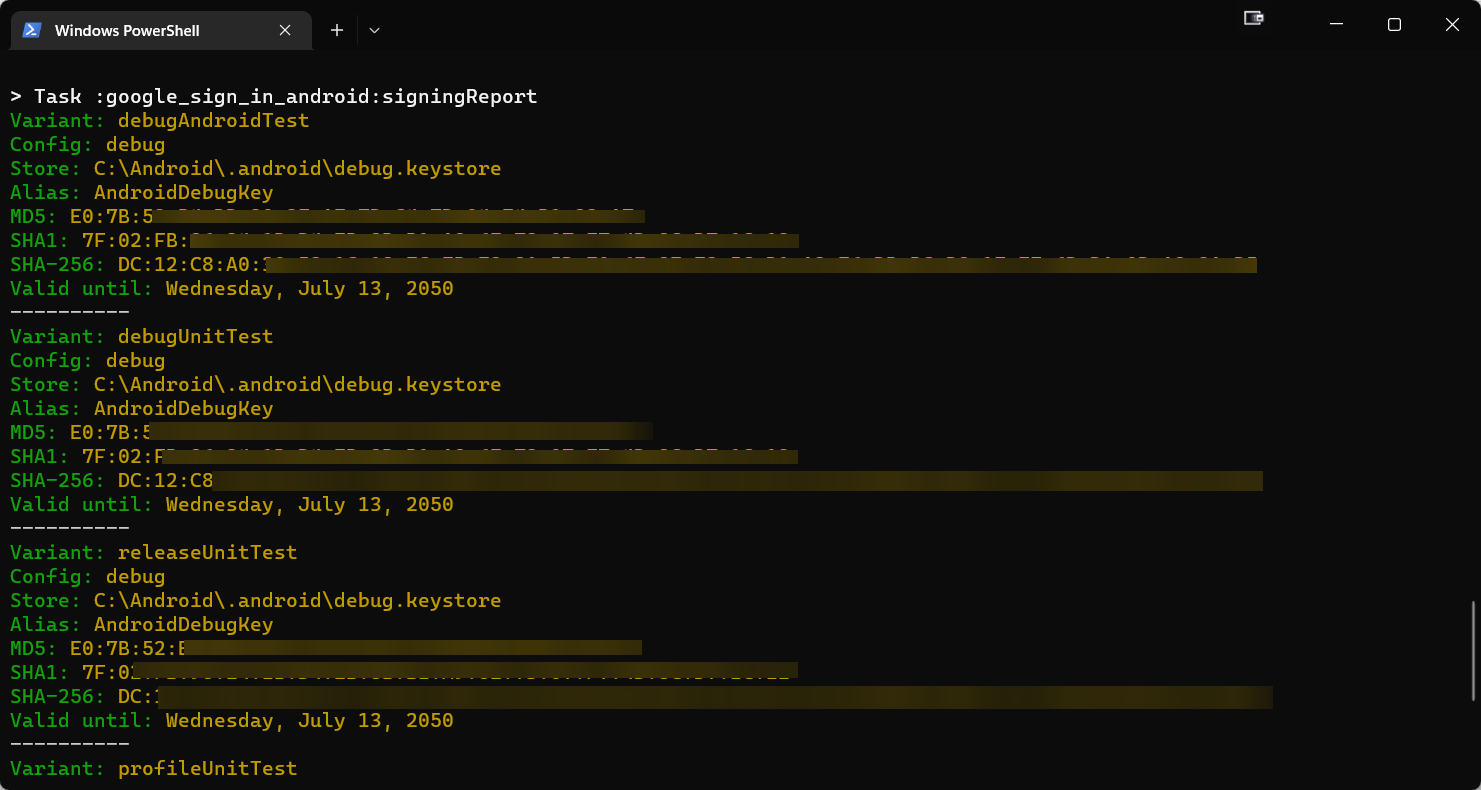
Copy your SHA-1 key which will be required for the next step in firebase.
3. Generating google-services.json file
Go back to the firebase and click the android button on the screen that comes up right after creating your project.
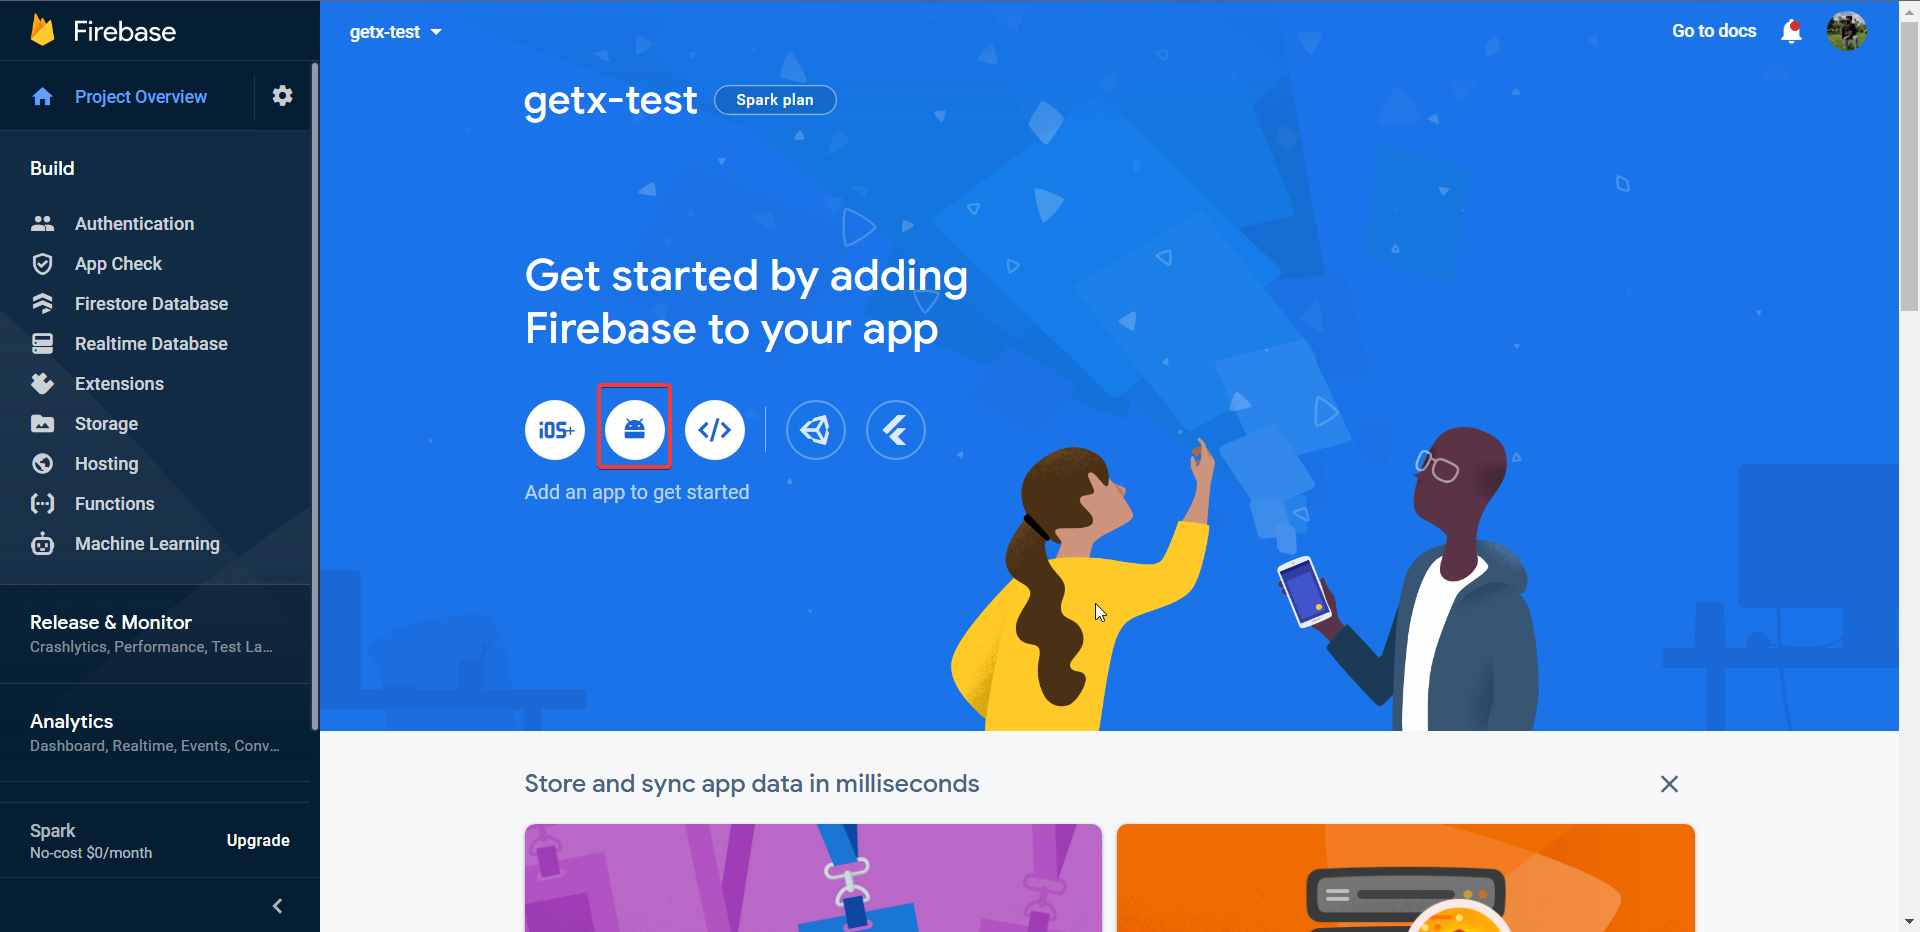
Follow the onscreen instructions carefully and paste the SHA-1 key you copied.
Download the google-services.json file and paste it in lib->android->app
Make sure you follow the instructions carefully and make the changes in the gradle files!
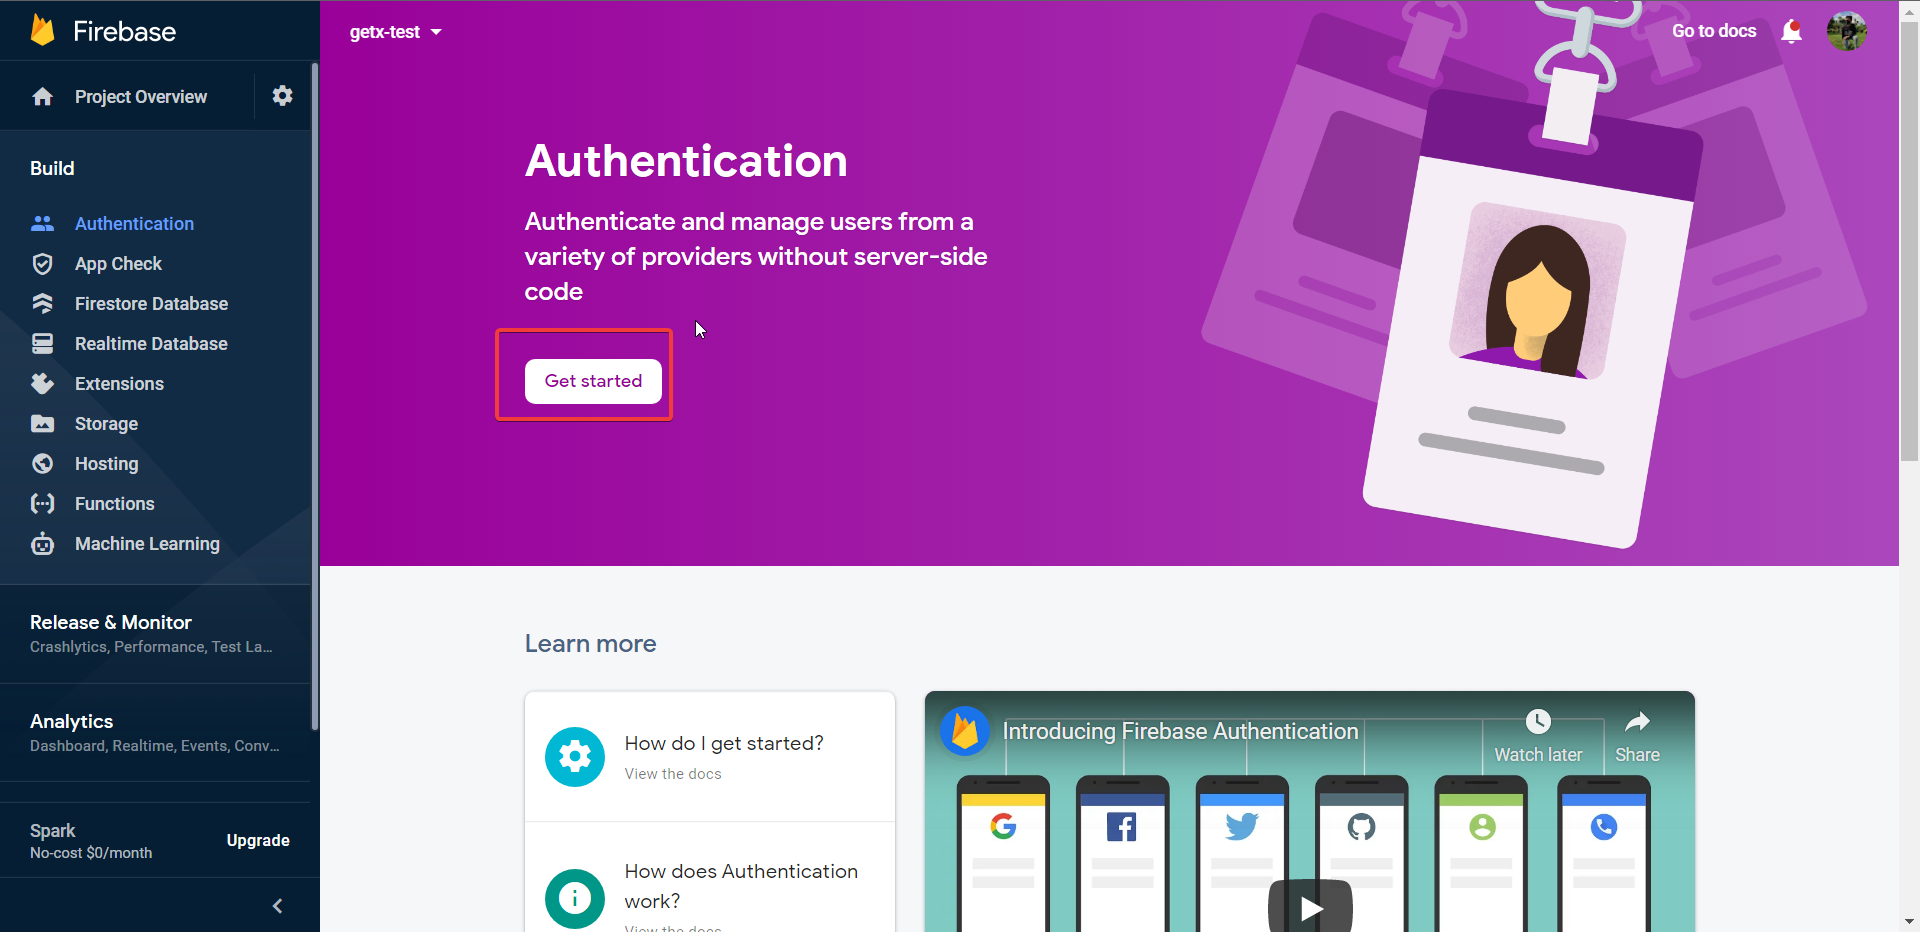
4. Enabling Google Sign-in
Click on the Authentication tab in project overview as shown in the image below
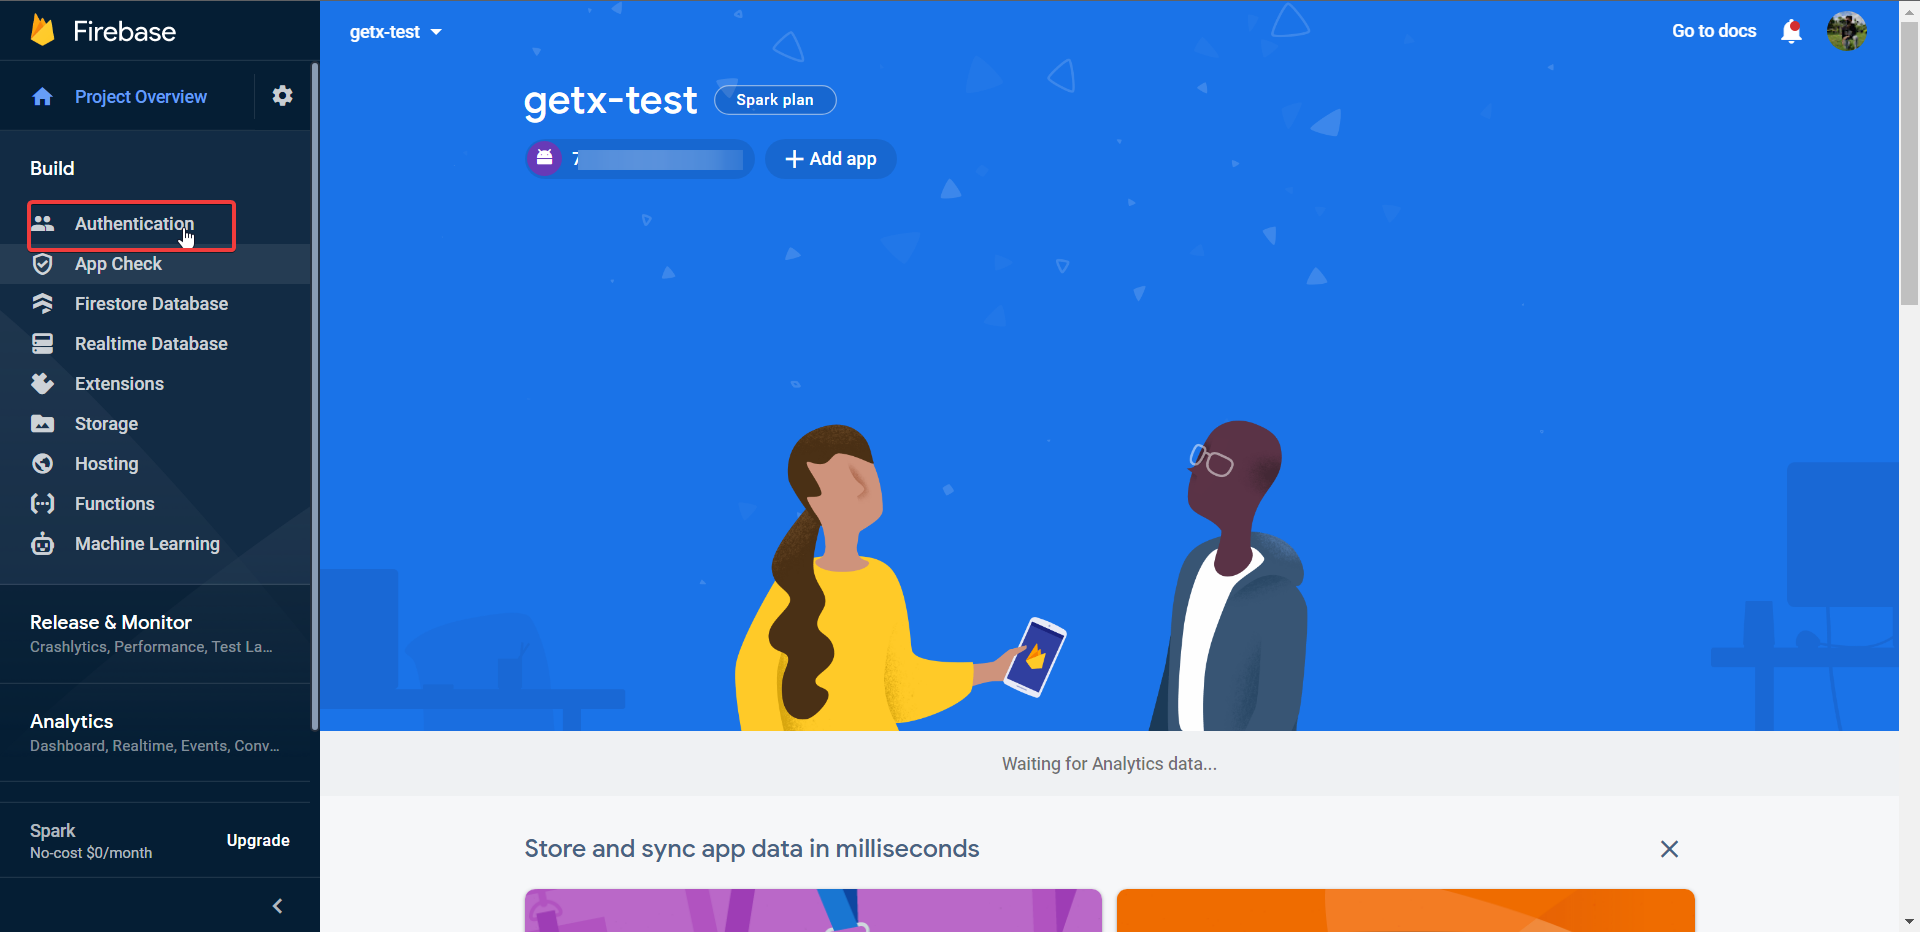
Click on Get Started.
Click on Google under Additional Providers
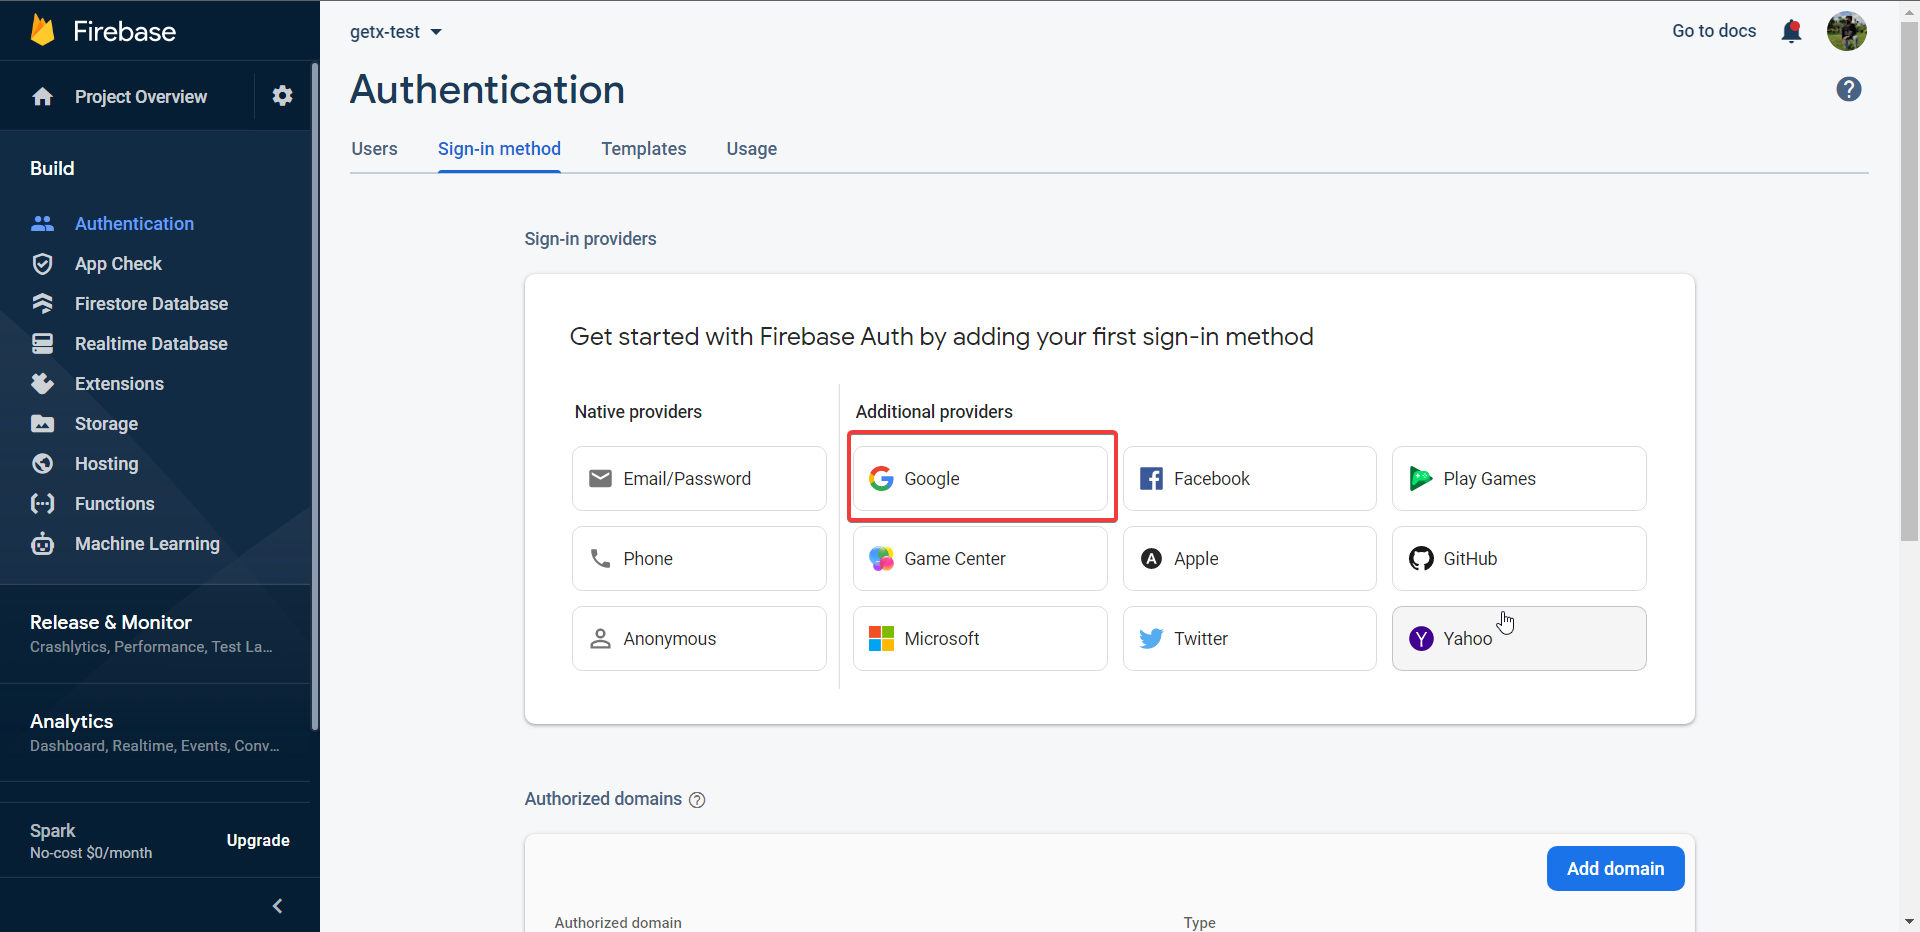
Click on enable and then save!
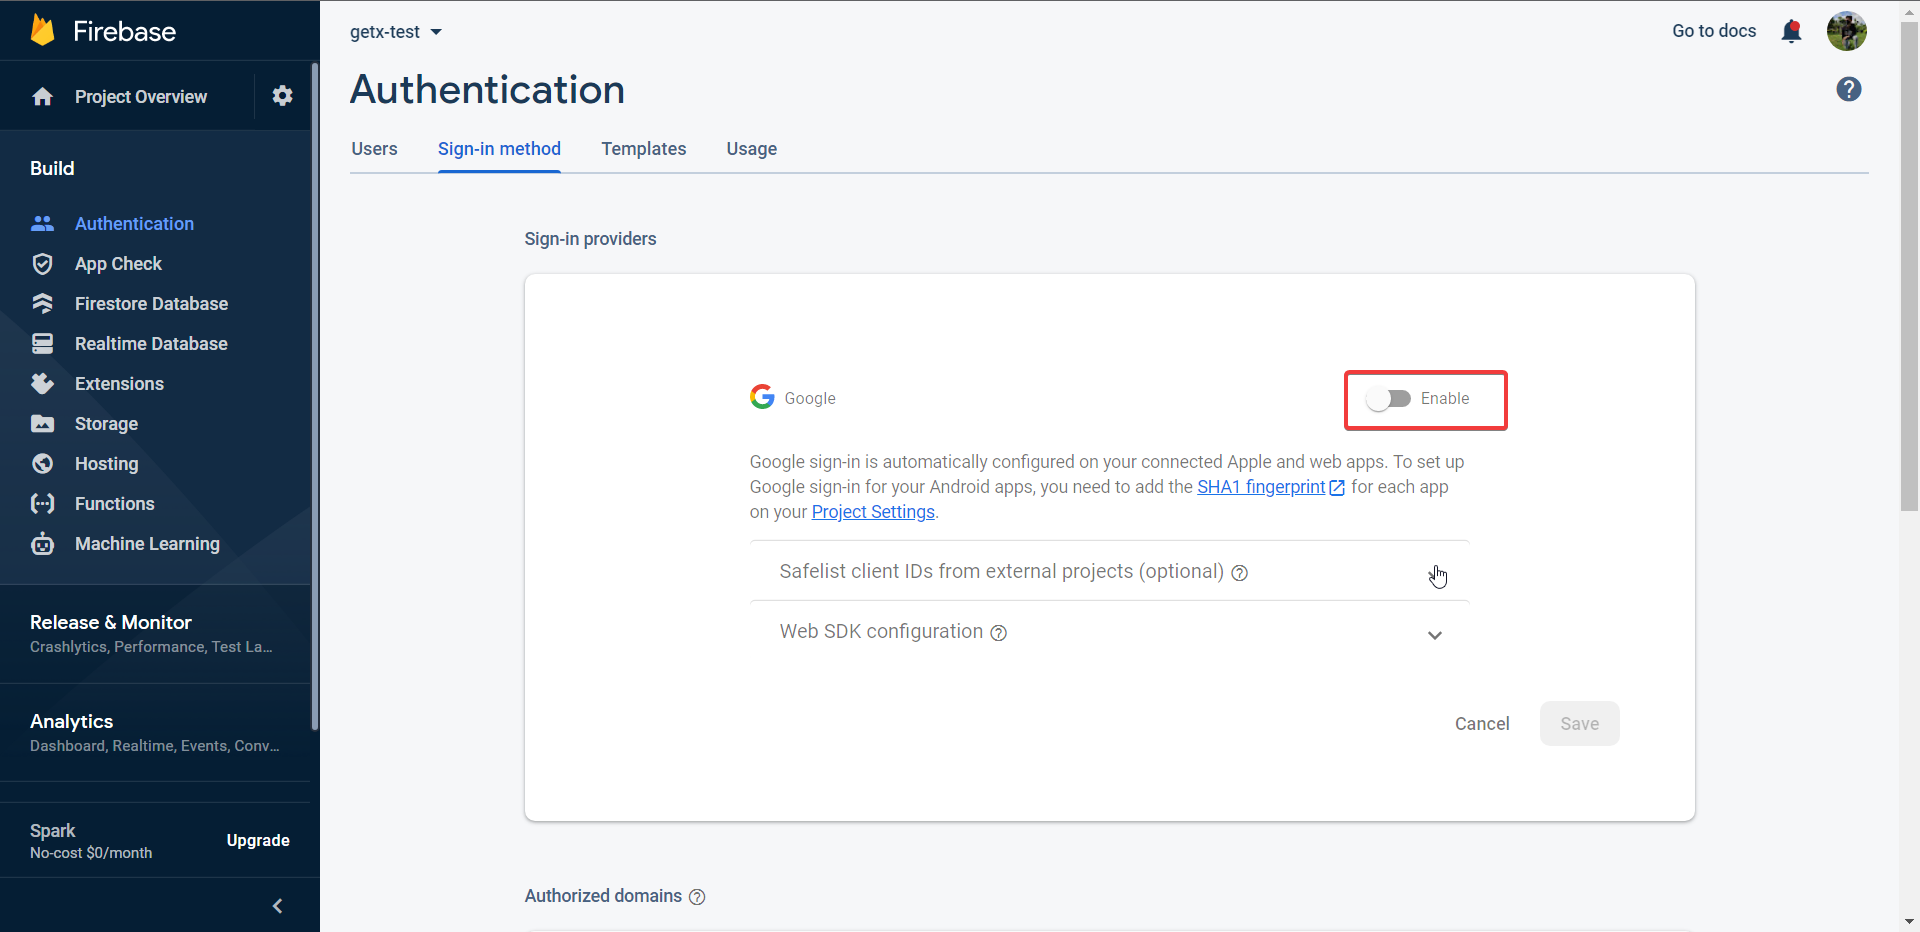
Great! Now we're done with the firebase setup part and we can finally get our hands dirty with some actual code!
Writing some actual code
Note:
Please refer to the project structure before going any deeper. The code and explanation will make more sense.
1. Setting up our main.dart
main.dart
import 'package:firebase_core/firebase_core.dart';
import 'package:flutter/material.dart';
import 'package:get/get.dart';
import 'package:getx_authentication_google/bindings/authentication_binding.dart';
import 'package:getx_authentication_google/views/home_view.dart';
import 'package:getx_authentication_google/views/login_view.dart';

void main() async {
  WidgetsFlutterBinding.ensureInitialized();
  await Firebase.initializeApp();
  runApp(const LoginPage());
}

class LoginPage extends StatelessWidget {
  const LoginPage({Key? key}) : super(key: key);

  @override
  Widget build(BuildContext context) {
    return GetMaterialApp(
      initialRoute: '/',
      getPages: [
        GetPage(
            name: '/',
            page: () => LoginView(),
            binding: AuthenticationBinding()),
        GetPage(
            name: '/home',
            page: () => HomeView(),
            binding: AuthenticationBinding())
      ],
    );
  }
}
So, let's understand what's happening here.
In the beginning, we've imported all the dependencies required for this file.
WidgetsFlutterBinding.ensureInitialized()makes sure that an instance ofWidgetsBindingexists so thatFirebase.initializeApp()can call native code to initialize Firebase. You can find more information on this here.GetMaterialAppis provided by GetX which helps us with Route Managment. It takes an additional argument calledgetPageswhich is a list ofGetPage.GetPageis essentially just a named route, except since we're working in the GetX ecosystem, we can specify an additional argument called binding.
Bindings essentially help us separate the business logic from our view files. More on this later.
That's all we need to understand in the main.dart file.
2. Making our User Model
user_model.dart
class UserModel {
  late String name;
  late String email;
  late String id;
  late String photoUrl;

  UserModel({required this.name,
      required this.email,
      required this.id,
      required this.photoUrl});
}
Models are essentially just a representation of something that we can use to store information. For example, a user can be made into a model. Similarly, a product can also be made into a model.
In our user_model.dart we have essentially described various fields for Name, Email, Google Account Unique ID and Photo Url.
3. Creating our controllers
authentication_controller.dart
import 'package:get/get.dart';
import 'package:getx_authentication_google/models/user_model.dart';
import 'package:google_sign_in/google_sign_in.dart';

class AuthenticationController extends GetxController {
  final GoogleSignIn _googleSignIn = GoogleSignIn();
  late UserModel userModel;
  @override
  void onInit() {
    super.onInit();
  }

  @override
  void onReady() {
    super.onReady();
  }

  @override
  void onClose() {}

  // Logins user using GoogleSignIn
  loginWithGoogle() async {
    try {
      final GoogleSignInAccount? googleSignInAccount =
          await _googleSignIn.signIn();

      userModel = UserModel(
          name: googleSignInAccount!.displayName.toString(),
          email: googleSignInAccount.email,
          id: googleSignInAccount.id,
          photoUrl: googleSignInAccount.photoUrl.toString());
      await Get.offNamed('/home', arguments: userModel);
      return;
    } catch (e) {
      throw (e);
    }
  }

  /// Logs user out
  Future<void> logoutGoogle() async {
    await _googleSignIn.signOut();
    Get.offAllNamed('/');
  }
}
Alright, so now let's go over our Authentication Controller code.
Obviously, since we're working with GetX ecosystem, we shall extend the class with GetXController.
GetXControllergives us access to many methods such asonInit(),onReady()andonClose(). These methods essentially help you separate business logic from your view files. You can also call these methods while using a stateless widget (you'd ideally have to use a stateful widget'sinitState())._googleSignIngives us access to an instance of GoogleSignIn that we will use for authentication.
Let's understand what's happening with our loginWithGoogle function.
- We have made this function asynchronous since we'll be calling some methods that will return a Future value.
googleSignInAccountwill hold the identity of the user once he signs in with his google account.userModelwill consist of aUserModelbuilt with the properties ofgoogleSignInAccount- We then move to our home page, passing the
userModelas an argument using theargumentsparameter inGet.offNamed() - Since we use
Get.offNamed(), the login view will be removed from the stack, therefore itsAuthenticationControllerwill be automatically disposed (more on this later).
home_controller.dart
import 'package:get/get.dart';
import 'package:getx_authentication_google/models/user_model.dart';

class HomeController extends GetxController {
  final UserModel userModel = Get.arguments;
  @override
  void onInit() {
    super.onInit();
  }

  @override
  void onReady() {
    super.onReady();
  }

  @override
  void onClose() {}
}
home_controller.dart also extends the GetxController.
This controller essentially contains a single variable called userModel which contains the arguments passed to the /home route.
We access these arguments using Get.arguments
4. Making our view files
login_view.dart
import 'package:flutter/material.dart';
import 'package:get/get.dart';
import 'package:getx_authentication_google/controller/authentication_controller.dart';

class LoginView extends GetView<AuthenticationController> {
  const LoginView({Key? key}) : super(key: key);

  @override
  Widget build(BuildContext context) {
    return Scaffold(
        appBar: AppBar(
          title: Text('Google Signin'),
          centerTitle: true,
        ),
        body: Center(
          child: Container(
              child: ElevatedButton(
            onPressed: () async {
              await controller.loginWithGoogle();
            },
            child: Text('Login with Google'),
          )),
        ));
  }
}
This part is essentially writing code to finish our UI for the app.
We extend the
GetView<AuthenticationController>which is essentially just aStatelessWidgetexcept, it makes our code neater since we get access to a variable calledcontroller.If you used a
StatlessWidgetthen you'd have to useGet.find<AuthenticationController>()which finds an instance of the controller (which we injected through the bindings!)We have a single
ElevatedButtonwhich has anonPressed()property which essentially just calls theloginWithGoogle()function in our Authentication Controller.
We access an instance of our Authentication Controller using controller.
home_view.dart
import 'package:flutter/material.dart';
import 'package:get/get.dart';
import 'package:getx_authentication_google/controller/authentication_controller.dart';
import 'package:getx_authentication_google/controller/home_controller.dart';
import 'package:getx_authentication_google/models/user_model.dart';

class HomeView extends GetView<HomeController> {
  const HomeView({Key? key}) : super(key: key);

  @override
  Widget build(BuildContext context) {
    UserModel userModel = controller.userModel;
    return Scaffold(
      appBar: AppBar(
        title: Text('Home'),
        centerTitle: true,
      ),
      body: Center(
          child: Column(
        mainAxisAlignment: MainAxisAlignment.center,
        children: [
          Image.network(userModel.photoUrl),
          Text(
            'Name: ${userModel.name}',
            style: TextStyle(fontSize: 18),
          ),
          Text(
            'Email: ${userModel.email}',
            style: TextStyle(fontSize: 18),
          ),
          ElevatedButton(
              onPressed: () async {
                AuthenticationController authenticationController =
                    Get.find<AuthenticationController>();
                await authenticationController.logoutGoogle();
              },
              child: Text('Logout'))
        ],
      )),
    );
  }
}
Our
home_view.dartfile just displays the various details from our UserModel which we passed as arguments from our Authentication Controller.We access the
userModelvariable from our Home Controller.We also have an
ElevatedButtonto sign out whoseonPressed()function finds an instance ofAuthenticationController. We need this to call ourlogoutGoogle().
5. Using bindings for dependency injection
First, let's go over what bindings do.
Bindings will essentially help you decouple our business logic from our views.
authentication_binding.dart
import 'package:get/get.dart';
import 'package:getx_authentication_google/controller/authentication_controller.dart';

class AuthenticationBinding extends Bindings {
  @override
  void dependencies() {
    Get.lazyPut<AuthenticationController>(
      () => AuthenticationController(),
    );
  }
}
- We override the
dependencies()method to inject our controllers into the view. Get.lazyPutwill initialize our controller in our view only when it is needed making it more efficient.- Since we use
AuthenticationControlleras a dependency for ourLoginViewwe have to inject it in our view throughAuthenticationBinding - We will access an instance of
AuthenticationControllerin our view usingGet.find<AuthenticationController>()or usingGetView<AuthenticationController>
Bindings are so cool, right!?
home_binding.dart
import 'package:get/get.dart';
import 'package:getx_authentication_google/controller/authentication_controller.dart';
import 'package:getx_authentication_google/controller/home_controller.dart';

class HomeBinding extends Bindings {
  @override
  void dependencies() {
    Get.lazyPut<HomeController>(
      () => HomeController(),
    );
    Get.lazyPut<AuthenticationController>(
      () => AuthenticationController(),
    );
  }
}
In
home_binding.dartwe injectAuthenticationControlleronce again since GetX automatically disposes the controller for us once the page is removed from the stack.Since we used
Get.offNamed('/home')in ourauthentication_controller.dart, it will automatically dispose the controller once we reach our home view.We also inject
HomeControllersince we need access to ouruserModelto display user details.
That's it!
You should now have a fully working app built in the GetX ecosystem!
I know this article was pretty extensive, but I wanted to make sure that y'all understood every bit of code that went into building this :)
Feel free to ask me anything if it wasn't particularly clear and to correct me if I went wrong somewhere!


